Showing posts with label Appetizers. Show all posts

August 20, 2014

Spicy Shrimp Stuffed Avocados

Writing about our recent trip to Paris has made me crave some of the foods we enjoyed whilst there. On our first night, after our tour of Montmartre, we were cold and tired and hungry. Luckily, there were dozens of restaurants near our apartment. We chose one at random (I wish I remembered the name), and had a great meal.

But it was our appetizer that really stuck in my brain and just won't get out. It was creamy, a little bit spicy, and absolutely de-lish. Of course I had to recreate it!


Nom nom nom nom nom!

I love avocado anything, so this totally appealed to me. Shrimp salad stuffed inside an avocado? Heck yes! The nice thing is that you could serve this as an appetizer, but it makes a great main dish as well. The Hubs and I ate it for dinner.

I will forewarn you: This recipe is complicated. BUT, you can take some shortcuts that actually make the recipe extremely simple. For example, you can buy your shrimp already cooked. And you can use regular mayonnaise and simply add the spice to it, rather than making your own. So don't be scared, ok?

Ok, let's get this party started!

Cooking the shrimp

We'll begin by cooking the shrimp. If you choose, you can buy your shrimp pre-cooked and skip this step. I think they taste better when you do it yourself, though.

So, add 1 thinly sliced lemon, ½ thinly sliced sweet onion, and 2 tablespoons of Old Bay seasoning to a large pot of water. Bring it to a boil. Allow to boil for 5 minutes, then add 2 pounds of uncooked shrimp with the shells on (cooking with the shells adds extra flavor). Continue to boil for 4-6 minutes, until the shrimp are done. Then immediately plunge the shrimp into an ice bath. This stops the cooking process. You don't want your shrimp to become overcooked and rubbery.

When the shrimp have cooled sufficiently, you can peel them and set them aside for later use.

Next, we'll make our mayo. Again, you could purchase regular mayo and add seasoning to it rather than making your own. But it won't taste quite the same. And this isn't as hard as you think it is, I promise! Here's what you need:

Spicy mayonnaise ingredients 


As usual, I forgot an ingredient in the picture. Whoopsie! (You also need 1 chipotle pepper in adobo sauce). I highly recommend the use of a food processor for this task. You can make this with an immersion blender as well, or the really brave can whisk by hand. But that adds unnecessary difficulties to your life.

To your food processor add 1 teaspoon of paprika, ¼ teaspoon cayenne pepper, 1 chipotle pepper in adobo, 1 large egg (at room temperature, very important!), 2 egg yolks (also at room temperature), ½ teaspoon dijon mustard, ¼ teaspoon salt, and 2 tablespoons of fresh lemon juice. Whirl it all around until the mixture is nice and creamy.


Here is my best advice for making mayo… first, make sure your ingredients are as fresh as possible. Don't use old eggs. Second, make sure all your ingredients are at room temperature before you begin. And third, when you begin adding the oil (next step), do it as slowly as possible.

Like, it's ok if this next step takes you 5 minutes or more.

With your food processor whirring away, slowly slowly drizzle in 1 ½ cups of canola oil. Begin by barely dripping the oil into the mixture. If the oil doesn't properly incorporate, then your mayonnaise will break. That is no good, my friends. As you drizzle in the oil, you'll notice your mixture thickening. This is good! Once you've added all of the oil, your mayo will look something like this:

Spicy mayonnaise
Yum! Again, you could always spice up the mayo you already have in your fridge. But once you try this, you'll see how easy it really is and you'll never go back. The depth of flavor is worth it.

You're almost done now… Add 1 cup of the spicy mayo to your shrimp. The mayo actually yields about 1 ¾ cups, so I save the extra and use it on sandwiches during the week. You can also drizzle a bit extra over your dish once it's complete, if you'd like a little more sauce. Also stir in 1 diced bell pepper, 2 stalks of diced celery, and 1 finely minced shallot.


The rest is all assembly. Cut your avocados in half and remove the pits, then gently scoop out the pulp in one piece. I totally should have taken pictures of this process, but I was so excited to eat that I forgot! Luckily, Real Simple has an easy tutorial you can follow.

Fill the hole left by the pit in your avocado with the shrimp salad. Put a big old heaping scoop in there! Sprinkle a little cilantro on top, and serve with a salad on the side. My salad contained some spring mix, grape tomatoes, and radishes. Add a lemon wedge to the plate too.


Mmmmmm….. you're all ready to eat! Slice up your avocado and eat with the salad, squeezing the lemon wedge over the top of everything.

I'm so happy I can take myself back to Paris with just a bite of this dish. As always, the standard recipe is below. I'll be back soon with more tales of our adventures in the City of Lights. Until next time, happy cooking!


Thanks for reading, everyone!
Follow me on Facebook @ OurArmyLifeAccordingToTheWife
or on Pinterest, my newest obsession @ ArmyLifeFromTheWife

Email me: armylifefromthewife@gmail.com


Spicy Shrimp Stuffed Avocados

Ingredients:

For the shrimp:
2  lbs. uncooked shrimp, shell on
1 lemon, thinly sliced
½ sweet onion, sliced
2 tablespoons Old Bay seasoning
2 stalks celery, finely diced
1 small shallot, minced
1 red pepper, finely diced

For the spicy mayo: (all ingredients must be at room temperature)
1 teaspoon paprika
¼ teaspoon cayenne pepper
1 chipotle pepper in adobo
1 large egg
2 egg yolks
½ teaspoon Dijon mustard
¼ teaspoon salt
2  tablespoons fresh lemon juice
1 ½ cups organic canola oil

To serve:
4 avocados
2 pints grape tomatoes
Spring mix
1 lemon, cut into 8 wedges
1 bunch radishes, julienned
4 tablespoons cilantro, for garnish


Directions:

To cook the shrimp: Add 1 lemon (thinly sliced), ½ sweet onion (thinly sliced), and 2 tablespoons of Old Bay seasoning to a large pot of water. Bring water to a rolling boil. Allow to boil 5 minutes, then add the shrimp to the pot. Boil for 4-6 minutes, until the shrimp are done. Remove immediately and plunge into an ice bath to stop the cooking process. Once the shrimp has cooled, peel and set aside for later use.

To make the spicy mayo: Add all the ingredients except the oil to a food processor. Blend until smooth. With the food processor running, very slowly drizzle in the oil. It should take at least 5 minutes to drizzle in all of the oil. If this is done too quickly, then the mayo will not emulsify and it will break. Whir in the food processor until creamy.

For the shrimp salad: Mix the cooked and cooled shrimp with one cup of the spicy mayonnaise (save the remainder of the mayonnaise for use on sandwiches, etc). Stir in the red bell pepper, celery, and shallot. Set aside.

To assemble: Slice the avocados in half and remove the pit. Gently run a spoon around the edges of the avocado and scoop out the pulp in one solid piece. Place on a plate and fill the hole in the avocado with shrimp salad to overflowing. Sprinkle cilantro on top of the shrimp salad. Garnish the plate with a small salad of spring mix, grape tomatoes, and radish. Serve with a lemon wedge (this should be squeezed over the avocado and salad. They should be eaten together). 


July 7, 2014

Nectarine, Prosciutto, and Ricotta Crostini

I am a fan of all things finger food. And appetizers. I love appetizers. Seriously, I'd rather have a sampling of appetizers as my meal than anything else. The Hubs thinks I'm a bit nutty, but he tolerates it. Especially since he gets to eat all of my appetizer creations.

My latest obsession is this Nectarine, Prosciutto, and Ricotta crostini. I've made it three times already! After cooking up my fried egg pizza, I had a lot of ricotta cheese left over. Since I don't like waste, it had to go somewhere. Hence, this yummy deliciousness came to be:


Melon and prosciutto are a common flavor combination in Italy. I took it a step further here, and the results were awesome. The best part is it's super simple to make, but party guests would think you slaved away creating this. I'm definitely making this for my next get together.


The ingredients

To get started, slice a baguette into 20-24 slices. I bought mine at our local bakery, but you can use one you've made from scratch as well. Brush one side of the baguette slices with butter (or spray with cooking spray). Toast under your broiler until lightly browned.


Let the crostini cool slightly, then spread ½ - 1 teaspoon of ricotta on each piece. You want a nice layer, not too thick and not too thin. Sprinkle with salt and pepper, then add ½ slice of prosciutto to each crostini. Then top with some sliced nectarine, about 2 thin slices per piece. Drizzle with a little honey, sprinkle with basil, and viola!  You have magic.On some of my crostini, I replaced the nectarine with thin slices of green apple, and it was also magic, yay!


This recipe is so simple, even the Hubs can make it! And it's delicious too.


Try it out for your next party. Or, if you're like me, have it for dinner tonight. Until next time my friends, happy cooking! As always, the standard recipe is below.


Thanks for reading, everyone!
Follow me on Facebook @ OurArmyLifeAccordingToTheWife
or on Pinterest, my newest obsession @ ArmyLifeFromTheWife


The Standard Form:


Nectarine, Prosciutto, and Ricotta Crostini

Ingredients:

1 baguette, sliced into 20-24 pieces
2 large nectarines, thinly sliced
½ cup ricotta cheese
12 slices prosciutto, cut in half
Honey, for drizzling
30 basil leaves, chiffonade
Salt and pepper, to taste


Directions:

Brush the baguette slices with some butter, or spray with cooking spray. Toast the baguette slices under your broiler until lightly browned. Cool for a few minutes.

Spread each baguette slice with ½ - 1 teaspoon of ricotta cheese. Sprinkle with salt and pepper, then top each crostini with ½ piece of prosciutto. Evenly distribute your thinly sliced nectarines over the prosciutto. I usually have enough to use two slices per crostini. Drizzle the nectarines with honey, then sprinkle the basil over the top.


Enjoy!


June 5, 2014

Insalata Caprese

Whenever the Hubs is away, I revert back to simple comfort recipes like Welsh Rarebit or my Magic Avocado Sandwich. This Insalata Caprese is another of my quick, go-to dishes.


With the ingredients on hand, I can be eating in just a few minutes, that's how easy this is! This is what you need to get started: 


A couple Roma tomatoes, fresh basil, balsamic glaze (or reduction), olive oil, salt and pepper, and most importantly… you need fresh mozzarella. Please, please, please don't buy that vacuum sealed stuff. Fresh mozzarella is stored in water, and it is oh so delicious. 

You gotta trust me here, peeps. Without the fresh mozzarella there is no point in making this dish. It wouldn't even be close to the same. 

So, now that I've given you my standard mozzarella lecture, let's get to it! 

This dish is all about layers. Start with a layer of sliced Roma tomatoes, then top each tomato slice with a layer of basil leaves. On top of that, place a slice of fresh mozzarella (see how I sneak that in again?). Sprinkle the fresh mozzarella with some salt and pepper. Then sprtiz with a little extra virgin olive oil (I use my handy Misto for this). Drizzle it all with some balsamic glaze, and then you're ready to eat… 


How easy is that?! 

While I often have this as my lunch, this is also a great appetizer. I always whip up a batch for girls' night or when I have family visiting. No muss, no fuss. And the flavors are fantastic! 


As always, the standard recipe is below. Until next time, happy cooking!


Thanks for reading, everyone!
Follow me on Facebook @ OurArmyLifeAccordingToTheWife
or on Pinterest, my newest obsession @ ArmyLifeFromTheWife

Email me: armylifefromthewife@gmail.com


The Standard Form: 

Insalata Caprese

Ingredients:

2 Roma tomatoes, evenly sliced into 8 pieces
8 fresh mozzarella medallions or slices (1, 8 ounce fresh ball, sliced)
Fresh basil leaves
Olive oil
Balsamic glaze
Fresh ground black pepper
Salt

Directions:
  
Place the tomato slices on the plate, arranged in whatever pattern you prefer. Place one or two basil leaves over each tomato slice. Top each piece with a slice of fresh mozzarella. Sprinkle with salt and pepper, then spritz with a bit of olive oil. Drizzle with balsamic glaze.

Serve and enjoy

April 29, 2014

White Pimento Cheese Spread

When you move around a lot, you start missing things from all over the world. Of course, I always miss  the food! And places. And cool shops. And a whole host of other things.

But mostly the food. And the people.

You feel me here, peeps? I miss Mexican food from El Paso, and crumb cake from New York. I already have a list of things I know I'll miss from Germany. One of the things I crave the most comes from the town I grew up in, in Virginia. A local company made a "gourmet white pimento cheese spread" that was absolutely to die for.

Like the crumb cake, the cheese couldn't be shipped. Something had to be done! So I re-created it at home, and now I eat it whenever I want.  

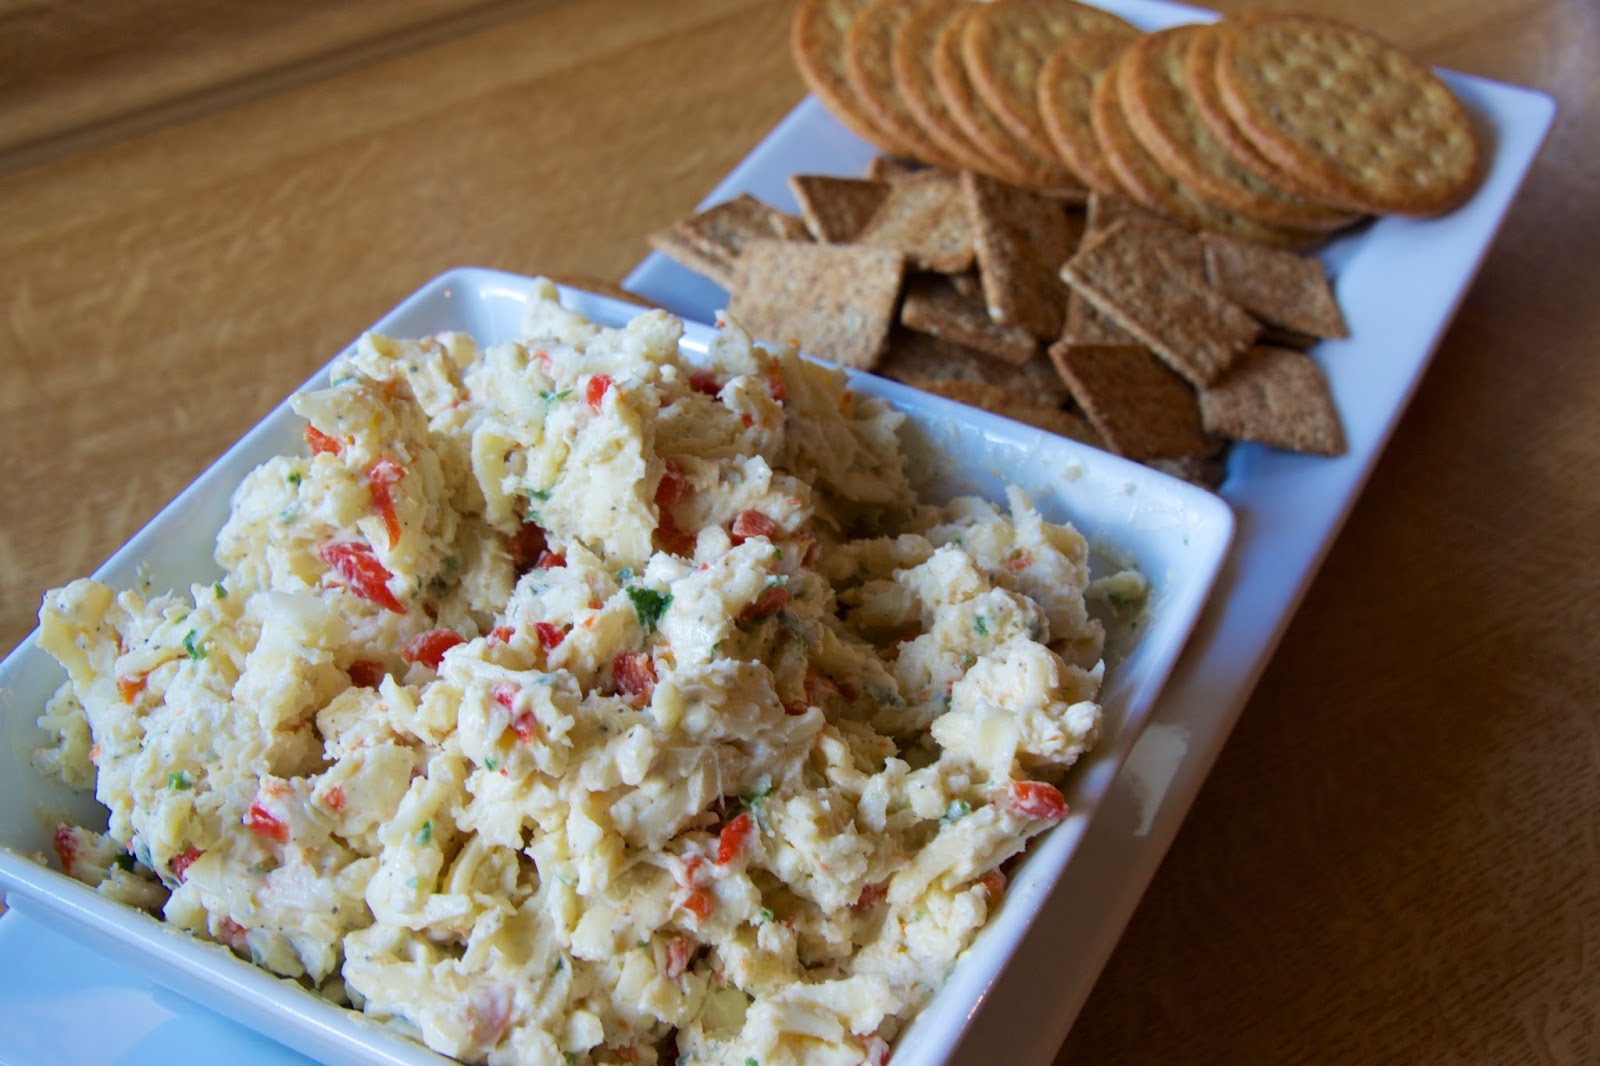
White Pimento Cheese Spread

Because that's how I roll.

Oddly enough, I used to be prejudiced against pimento cheese. I thought it was weird. But then I tried the "gourmet" version, and I was hooked. I bet you will be too. Come on, give pimentos a chance…

The ingredients are pretty basic:

The ingredients

And the method is pretty easy. Start by mixing a few spices into ½ cup of mayonnaise: ¼ teaspoon salt, ¼ teaspoon pepper, and an ⅛ teaspoon garlic powder.


Then, whip 3 ounces of cream cheese until it's all light and fluffy. I do this with my hand mixer, the process is much quicker this way. Blend your mayo mix into the fluffy cream cheese.


This goopiness may look weird, but it's the binder for your cheeses and it's going to taste delicious when everything is put together, I promise. The most important ingredient in your spread is the cheese. Don't by the pre-shredded stuff, people! Grate your own, it's worth it. Trust me.

So, to your goop, add 2 cups of freshly grated white cheddar cheese. You can use the yellow kind, but then it wouldn't be white pimento cheese anymore. The white cheddar has a slightly different flavor too, try it one time and you'll see.

Also add 1 cup of freshly grated Monterey Jack cheese, and ¼ cup of fresh grated Parmesan. Grate the Parmesan on the littlest hole of your grater, kay? Also on the smallest opening, grate 2 teaspoons of onion.

The smallest grater side

Stir in 2 tablespoons of minced green onion as well, and 1 jar (4 ounces) of diced pimentos, drained of the liquid.

Mix it all around, and viola! White pimento cheese. I suggest chilling the mixture for at least 2 hours before serving, but you don't have to. To be honest, I always taste test a couple bites before the cheese makes it into the fridge. Don't tell!


I make this for parties, or weekend snacking. Or weeknight snacking. And I always make a double batch, because the Hubs is a pimento cheese hog. If you want to spice things up a little, try adding a bit of minced jalapeño to the mix.

Until next time, happy cooking!


Thanks for reading, everyone!
Follow me on Facebook @ OurArmyLifeAccordingToTheWife
or on Pinterest, my newest obsession @ ArmyLifeFromTheWife


The Standard Form: 


White Pimento Cheese Spread

Ingredients:

½ cup mayonnaise
¼ teaspoon salt
¼ teaspoon black pepper
1/8 teaspoon garlic powder
3 oz. cream cheese, softened
2 cups sharp white cheddar cheese, grated fresh
1 cup Monterey Jack cheese, grated fresh
¼ cup Parmesan cheese, grated fresh
1 (4 oz.) jar pimentos, drained
2 teaspoons finely grated onion
2 tablespoons green onions, minced

Directions:


Mix the garlic powder, salt, and black pepper with the mayonnaise. Beat the cream cheese until light and fluffy, then add the mayonnaise mixture to it and beat until well combined. Stir in all three types of cheese, the grated onion, pimentos, and green onions. Mix until well blended. Chill before serving. Serve with crackers, or as a sandwich.

November 5, 2013

Fresh Corn and Tomato Bruschetta

I haven't had much time for cooking since The Hubs and I arrived in Germany. Of course, I also had no pots and pans (or anything else for that matter!), so cooking would have posed a few problems anyway.

But I've really missed this daily chore. Which for me is really no chore at all, more like a mad science experiment. And I've especially missed cooking with my friends, or cooking for them (and them cooking for me!).

Remember my deployment battle buddies? Of course you do! We developed Ladies' Night In, a fantastic opportunity to hang out together and test our culinary skills on each other. I really, really miss my ladies. I think they should all move to Germany too! I'd like you to be on my side in this matter.

Earlier this week, when I was especially missing my gal pals, I came across these photos of an experiment gone right. Inspired by my best Canadian pal, and another Ladies' Night In moment, I created this Fresh Corn and Tomato Bruschetta.

I'm completely obsessed. Have been, actually, from the first moment Caleigh (my Canadian pal!) served us something similar at her home. I immediately started on a recreation and elaboration. THIS is the result:

Corn and Tomato Bruschetta


Nom nom nom nom nom.

Let me repeat that. Nom nom nom nom nom. 

You've no idea, seriously. This is a MUST try. Hubs will be forever grateful to Ladies Night In evenings for this delicious treat. After the creation, we actually ate it three more times in the same week!

It's that good, people.

So let's get this party started:


The ingredients

To start, I should warn you: This recipe makes A LOT. But don't worry, you'll eat it all. Or, make this as an appetizer for a party. Huge hit. HUGE.

As usual, my pictures don't quite capture all the ingredients. After creation, I realized I need twice the filling to use up all the spread (you'll see). So, some of the ingredients are actually double what you see here. Plus, ahem... you won't be using basil at all, but cilantro instead.

My bad.

Anyway, let's begin with the spread. Using a ripe avocado, blend it together with 8 ounces of whipped cream cheese (1 container), 1 tablespoon fresh lemon juice, and five cloves of roasted garlic. If you've never roasted garlic before, it's quite simple. This tutorial on WikiHow is easy to follow.

Avocado spread

The picture above is what your spread will look like once blended. For now, set this mixture aside in your refrigerator while you finish the rest.

Next, slices two loaves of French (or Italian) bread. I like mine sliced thick, but this is up to you. The thicker the bread, the more topping it will comfortably hold. I'm a glutton for this stuff.

Toast the bread using your preferred method. I like the bread toasted on only one side, so I usually spray that side with a bit of baking spray, then toss it under the broiler for a few minutes. You can toast yours however you like!

In the meantime, finely chop 2 small red onions (or 1, if you like things less oniony). Sauté in a bit of butter to draw the sweetness out. Set aside to cool.

Lightly sautéed onions 

At the same time (or separately if you've a tendency to get distracted and burn stuff), cook 12 slices of peppered bacon. If you don't have access to peppered bacon, that's ok. Just add a little extra pepper to your final corn mixture to make up for it, kay? Crumble the bacon into small pieces.

Now comes the really fun part.

In a large mixing bowl, mix together your onions and bacon, plus 4 ears worth of sliced-off-the-cob corn kernels. You heard me, just slice it right off the cob and into the bowl. No cooking necessary!

To this, add 1 pint of quartered cherry (or grape) tomatoes. Drizzle in just enough olive oil to coat (about 2 teaspoons, maybe less). Salt and pepper to taste. This doesn't require much! Unless, of course, you are without the peppered portion of the bacon.

Gently stir in some chopped cilantro. I used... a bunch. Maybe two bunches. Probably about a cup.

I like cilantro.

When all is said and done, it should look a little something like this:


Corn mixture

Everything else is a cake walk!

Shmear your bread with a bit of the avocado mixture, and then spoon some corn mixture on top. Bite in. Savor the moment. Thank Caleigh for the inspiration, because your life won't ever be the same after this.

Mmmmmmm......


As always peeps, I've included the recipe at the bottom here. I'll be back in my kitchen soon, testing some new recipes for my favorite people.

That would be you.

Until then, happy cooking!!


Thanks for reading, everyone!
Follow me on Facebook @ OurArmyLifeAccordingToTheWife
or on Pinterest, my newest obsession @ ArmyLifeFromTheWife


The Standard Form:

Fresh Corn and Tomato Bruschetta

Ingredients:

8 ounces whipped cream cheese
1 ripe avocado
5 cloves roasted garlic
1 tablespoon fresh lemon juice
4 ears fresh corn, shucked and the kernels cut off
1 pint cherry (or grape) tomatoes, quartered
2 small red onions, diced and sautéed
12 slices peppered bacon, cooked and crumbled
2 teaspoon olive oil (or less)
2 bunches roughly chopped cilantro (about 1 cup)
Salt and pepper to taste
2 loaves French or Italian bread, for serving

Directions:

* Note: This recipe makes A LOT. If desired, cut in half for a smaller serving

In a large mixing bowl, blend the cream cheese with the avocado, roasted garlic, and lemon juice until smooth. Set aside.

Slice your French (or Italian) bread into thick slices. Spray one side with cooking spray (if desired) and brown underneath the broiler.  Keep close watch on your bread, you don’t want it to burn! Alternatively, you can toast in a regular toaster. Set aside to cool.

In another bowl, stir together the fresh corn kernels, tomatoes, sautéed red onion, and peppered bacon. Drizzle in the olive oil, adding just enough to lightly coat. Salt and pepper to taste. Gently stir in the chopped cilantro.

To serve: Spread the bread with the avocado mixture. Top with as much of the corn mixture as desired. Eat (with napkins!)   

April 2, 2013

Taco Crack

Yes, you read that right. I said taco crack. Ask anyone who has eaten this dip, and they will tell you:

It's highly addicting.

Like crack.

Hence the name.

Taco Crack 

I'm not sure where this recipe originated from, but I've been making it since high school, so it's been around a while. No cracks (haha) about how old I am, ok?

This past weekend, I made the Crack for a get together at my pal Tiffany's house. Since it was taco night there (actually, there's a special name for the tacos they served, but I can't remember!), this dip was a great starter. Not only simple to make, but it travels fairly easy, and everyone loves it.

If you've got ten minutes, then you have time to make this dip. Let me show you how easy it is:

The ingredients

To start, you need 2 packages of cream cheese, 16 oz of sour cream, and 2 packages of taco seasoning. If you make your own seasoning, feel free to use that instead. Someday I'll be that cool, but I'm not quite there yet.

*Note: This recipe makes enough to fill a 9x13 pan. If you'd like a smaller version, cut the ingredients in half and use an 8x8 pan instead 

Using a hand-mixer, blend together the sour cream and cream cheese, ensuring there are no lumps. Once smooth, add the taco seasoning and mix well. It should look a little something like this:


The blending takes approximately three minutes.

Then, simply spread the mix into your 9x13 pan. At this point, you can cover and let the dip rest in your refrigerator until it's time to eat. This is what I usually do, but it's not necessary.

When you're ready to eat, sprinkle with shredded lettuce, then grated cheddar cheese, and top with diced tomatoes. This take another two minutes, maybe three if you're slow.


If you want to be extra special, you could also add some chopped cilantro.

And...

You're done! Grab some tortilla chips and dive into the Crack. But be warned: you may eat the whole pan yourself. So no fair crying to me if you put on a couple pounds, ok? I just provide the recipe.


As always, the standard recipe is below. Do you have any easy dips that you'd like to share? Email me if you're interested, I'd love to see you as a guest blogger for ArmyLife!


Thanks for reading, everyone!
Follow me on Facebook @ OurArmyLifeAccordingToTheWife
or on Pinterest, my newest obsession @ ArmyLifeFromTheWife


The Standard Form:


Taco Crack

Ingredients:

16 oz. sour cream
2 (8 oz each) packages of cream cheese
2 packages taco seasoning
1.5 cups (approximately) shredded lettuce 
4 Roma tomatoes, diced
10 oz cheddar cheese, grated
Chopped cilantro (optional)
Tortilla chips, for serving


Directions:

Combine the sour cream, cream cheese, and taco seasoning with a hand-mixer. Spread the mixture into the bottom of a 9x13 dish. Cover and chill in the refrigerator until ready to serve. Top with the shredded lettuce, cheddar cheese, and diced tomatoes. Top with chopped cilantro if desired. Serve with tortilla chips.  


September 5, 2012

And so it begins...

Yep. It's that time of year again...

FOOTBALL SEASON. 

The Hubs and I don't get along during football season. You see, I root for the best football team there is, the reigning Superbowl Champions... the NY Giants.

That's right, I'm a Giants fan (no hating please, I've been a fan since I first learned what football was!). I've spent many years waiting for my team just to make it to the Superbowl. You have no idea how happy I am since they've not only made it, but won several times in the past years.

The Hubs, on the other hand, must hang his head in shame. Naturally, he's hoping that his team will stomp all over my beloved Giants, and possibly give him a few bragging rights.

Not gonna happen, people.

Tonight is the night. TONIGHT, our teams are the opening game for the NFL season. That's right... tonight, it's the Giants vs. the Cowgirls. Oh, excuse me, I meant the Cowboys. Really!


A storm is brewing here tonight!

The Hubs and I are both pretty vocal about our football teams... so, just to make sure we don't injure each other, we've invited some friends to witness the event. I'm desperately missing my fellow Giants fan, Jackie, this year. I could always count on her to scream just as loud as me! Who will do a victory dance with me when the Giants trounce those Cowgirls??

Sigh.

Jackie may not be here in person this year, but I'm darn sure she's rooting on the Giants back home. We'll be mirror images, each in front of our own TVs, hooting and hollering...

Ok, so I'm a wee bit dramatic on game day.

The closer we get to kickoff, the more pumped I get. Generally, I distract myself in the kitchen, cooking up our favorite game-day treats. For this momentous occasion, I'm making my Jackie-inspired Buffalo Chicken Dip. Of course, man cannot live on Buffalo Dip alone, so we'll have a veggie tray and my yummy BBQ Chicken Pizza too. 

BBQ Chicken Pizza

You can check out the pizza recipe by following the link. Today, I'm going to show you how to make the dip that's perfect for all sporting events. This dip never has leftovers; it's completely addicting! The best part is it's sheer simplicity. Anyone, anywhere can make this dip.

Buffalo Chicken dip

Nom nom nom nom.... just seeing the picture makes me salivate. Thank goodness I get to eat it soon!

The ingredients are basic:


Shredded chicken, cheddar cheese, hot sauce, cream cheese, sour cream, and dry ranch dressing mix. The chips and celery are for the dipping!

For your chicken, there are lots of options. You can poach your own chicken breast (about 2), then shred the chicken to make 2 cups worth. This is what I do. If I have extra chicken, I use it later in the week for chicken salad!

BUT, if you don't want to do that, you can always buy a rotisserie chicken (already cooked, bonus!) and shred that. OR, if you're desperate, you can use canned.

So, chicken dilemma solved. Onward!

The first step is to gather your ingredients. Then, add the cream cheese (2 blocks) to a pot over medium heat. Pour the hot sauce (I use Frank's, it's the best!) right on top. You can use 1/2 cup, or 3/4 cup hot sauce. It's all about you, and how much heat you can handle.

Yeah, I use 1/2 cup. I'm a wimp like that.


 Stir that around until well-combined. The dip looks a little gross at this point (see above), but it's worth it, I swear.

Next, you're going to add everything else! Stir in the sour cream (8oz. but I sometimes use more), the shredded cheddar cheese (1 cup), the ranch mix (1oz.), and the chicken (2 cups). I was making a double-batch when I took these pictures, so don't worry if your dip looks smaller.


And.... you're done!

Seriously.

That's it.

Stir for a minute or two, so everything warms up, then spoon the dip into your serving dish. Surround with chips, celery, crostini, whatever you like for dipping. Personally, I think celery is the best!

Then be prepared to re-fill the dish often. I usually make a double-batch, the dip goes that fast!! Try this one time, and you'll be making it for all your parties. It's that good.


Mmmmmm.... I'm going to make mine right now! But I'll keep you posted on the game.

Go Giants!!! 


* Update: The Giants lost to the Cowboys, final score 24-17. I am investing in a good pair of ear plugs, so I can't hear the Hubs taunting me all week!! The rematch is scheduled for October 28th, in Dallas. The Giants will win that one (I hope!) 


The Standard Form:


Buffalo Chicken Dip


Ingredients:

2 cups chicken, cooked and shredded (about 2 breasts)
2 (8 oz. each) blocks of cream cheese
1 (8 oz.) container of sour cream
½ - ¾ cup Frank’s hot sauce
1 cup sharp cheddar cheese, grated
1 packet (1 oz.) powdered ranch dressing mix

Directions:

Cook the chicken using your preferred method, then shred or finely chop. (I prefer poaching the chicken breast and then using two forks to shred it).

Add the cream cheese and hot sauce to a crockpot or a heavy pot on the stove. Turn the heat to medium-high and stir until the cream cheese melts and is combined with the hot sauce. Once smooth and creamy, add the sour cream. Combine thoroughly, and then add in the powdered ranch dressing mix, again stirring until combined. Finally, add the cheddar cheese and shredded chicken. 

Lower the heat. Warm over medium-low heat until the cheddar cheese is melted and the dip is hot.

Serve with tortilla chips, celery sticks, bread cubes, etc.