Showing posts with label Paris. Show all posts

September 3, 2014

Keep Calm and Go To Paris, Part 5

This is the last part of my Keep Calm and Go To Paris series. And I'm kind of sad about it. I really loved visiting this beautiful city. The food, the art, the company… it was fantastic. I'll be going back again this winter with one of my other sisters, so I'll get a chance to see some of the things we couldn't get to on this trip. Naturally, I'll keep you updated!

In the meantime, you can catch up on this series by reading Part 1 (Montmartre and Moulin Rouge), Part 2 (walking tour and the Eiffel Tower), Part 3 (Versailles and Notre Dame), and Part 4 (Giverny and Monet's gardens).

For our last day, our only plans were to visit the Louvre, eat a nice lunch, and do a little shopping before catching the train home. If you're an art fan, the Louvre is an absolute must see. There is no way to see it all in a single visit, or even a dozen visits. I suppose you could run through each gallery and technically "see" everything, but if you want to appreciate what you're seeing it takes much more time.

Yes, we are "those" people,
outside the Louvre at the Invisible Pyramid entrance 

(Hint: To take pictures like the one above, it is a lot easier to move the camera versus the person! Have your subject place their hand in position, and then you move around them to get the picture lined up just right)

Of course, everyone wants to see the Mona Lisa. The largest crowds will be around this painting, and everyone will be pushing. Your best bet is to arrive as early as possible, make a beeline for the Mona Lisa, see her, and get the heck out of there.

That's what we did.


And yes… we totally selfied in front of her too. Don't judge me!

Our museum pass helped us skip the lines at the Louvre entrance, and we arrived just as they opened. This was perfect timing. Even in the few minutes it took us to see the Mona Lisa, crowds had started to form.

Since we knew we couldn't see everything, we each picked an area we wanted to walk through. Here's a look at some of the art we saw:

Winged Victory of Samothrace


Venus de Milo

After several hours, the Hubs and The Kid were really tired of art. If you're married or have kids, you know what I'm talking about. Their heads were down, feet were dragging, and the whining had begun.

Ugh.

We left around lunchtime, before anyone got too hangry (hungry + angry). We desperately wanted to eat at the Angelina's near the Louvre, but sadly it was under renovations. Next time! Instead, we found a great cafe, enjoyed a meal together, and wandered our way to the train station (shopping the whole way!)


The Kid made a new friend while waiting for the train, it was pretty funny. This gentleman was selling trinkets (candy, etc) to make money for his upcoming wedding. It was a great ending to a wonderful trip to Paris.

Until next time my friends, happy travels!


Thanks for reading, everyone!
Follow me on Facebook @ OurArmyLifeAccordingToTheWife
or on Instagram @ ArmyLifeFromTheWife
or on Pinterest, my newest obsession @ ArmyLifeFromTheWife


August 26, 2014

Keep Calm and Go To Paris, Part 4

Yep, this is a Part 4. Have you been keeping up on this Paris series? No?? That's ok. You can catch up if you want, with Part 1, Part 2, and Part 3. We've visited the Eiffel Tower, and Notre Dame, and Versailles, and so much more! With only two days left in Paris, we decided to leave the city for a bit and head out into the country to Giverny, home of Claude Monet.

Monet's gardens

This may not be of interest to you if you're not an art lover. I am, so off we went. I was pleasantly surprised to find the Hubs enjoyed this day trip as well. My mum loved it, of course, but The Kid could have taken it or left it. Every once in a while, I gotta push a little culture on her, ya know?

There are many ways to reach Giverny from Paris, if you don't have a car. We chose to take the train. It was quite confusing in the beginning, and there are only so many trains per day. The train doesn't actually go directly to Giverny. Rather, it stops in a small town called Vernon. You must take the train from Saint-Lazare Paris station. We purchased our tickets the morning of, and the price was about 30 euros each for the 45-minute round trip.


After the train stops in Vernon, you must then hop on a shuttle bus to Giverny. Seats on this are limited, and you must pay in cash at the door of the bus (4 euros each way). I know this sounds a bit complicated, but I promise it was a lot easier than it sounds!

The gardens were worth it to me. You'll have to decide for yourself if they hold the same value to you.

Water lily, in Monet's gardens


Seeing the spot where Water Lilies was painted literally made my heart flutter a bit. The same way I felt when I finally viewed Starry Night. We waited a while to take our pictures on the bridge in the water garden. People were crowded around, so it took quite a while. And then I waited to take a picture of the bridge with no one on it.


No photography was allowed inside the actual house, or I would post them here for you. It was a fairly ordinary home to me, except… one of the rooms was filled with paintings, all Monet's. I could have spent hours in there, it was fantastic. Tummies were rumbling, however. The Hubs doesn't do so hot without food, so we took a break for lunch before wandering the quaint town.

I gotta forewarn you about one thing. We took the next to last train back to Paris. We wanted to return early enough to visit the Arc di Triomphe before bedtime. Our train was so full, this is what happened:


The train was cramped, people everywhere. We sat on the stairs, and on the floor. We sat in each other's laps. And at every stop on the way, more people piled on. Just when you thought the car would surely burst at the seems… someone else slipped in.

You've been warned. We were so happy to get off that train.

Rather than taking public transport again, we chose to walk to the Arc di Triomphe. This was included on our museum pass, and I wanted to make the most of them. The pass allowed us to skip the ticket lines, always a bonus. The Arc is in the middle of a traffic circle. So how do you get there?

Well, don't run out into traffic people!! You can access the Arc from the underground station. There are signs pointing the way, though it was a bit confusing at first.


You can climb to the top of the Arc if you'd like to see the beautiful panoramic views. My mum didn't quite feel up to the task though, after asking the guard how many flights the climb was… so he let her take the elevator!

I had no idea there was an elevator here (there isn't one at Notre Dame). Thanks to the nice attendant, my mum enjoyed the views too.

One of several views from the
Arc di Triomphe

After walking back down, we were all ready for a quiet meal at our apartment and a good night's sleep. The next day, we had a train to catch back to Germany. But we still had some time to visit the Louvre! Stay tuned, peeps.

Until next time, happy travels!


Thanks for reading, everyone!
Follow me on Facebook @ OurArmyLifeAccordingToTheWife
or on Pinterest, my newest obsession @ ArmyLifeFromTheWife


August 21, 2014

Keep Calm and Go To Paris, Part 3

After our adventure to the top of the Eiffel Tower, the Fam and I set off on Day 3 in Paris. We were excited to travel a bit out of the city. Beautiful Versailles awaited us!

Outside the Palace of Versailles


Because we had the Paris Museum Pass, we were able to "skip" the line… what they don't tell you is that everyone else was smart enough to buy this pass as well, so we still waited in a fairly long line to gain entrance (about 45 minutes). The line was shorter than it would have been for sure, but don't expect to just walk right in. This way, you won't be disappointed.

Of course, we found ways to entertain ourselves in line…


Pay no attention to those crazy people.

Upon clearing through security at the entrance, we made our way into the labyrinth of rooms in the palace. Be forewarned, Versailles was extremely crowded. As in nose-to-nose with the person next to you. This could vary based on when you visit, but at least you'll know the large crowds are possible. Because of this, we didn't enjoy this visit as much as we might have otherwise. We skipped quickly through most of the rooms. I did love the ceilings though! In fact, I waited several times just to get a picture of the magnificent artwork above us.


The gardens were much more relaxing than the inside tour. We wandered freely for an hour, enjoying the fresh air and magnificent flowers.


Versailles gardens

After the garden tour though, we were ready to eat lunch and head back to the city. Hopes were high that we would return in time to visit Notre Dame and climb to the top. There are several restaurants grouped together near the train station, so all you have to do is pick one. We chose a creperie, yum!

Lunch (and dessert!)
Even with a leisurely lunch and some shopping, we returned with plenty of time to climb the towers of Notre Dame. The hike up 387 stairs is not for everyone! Keep in mind that there is no elevator, so I don't suggest this for anyone not in good physical condition. If you're up for it though, the view at the top is 100% worth the wait and the climb.


We even heard the bells ring! It was pretty loud, but also way cool. I had a sudden, almost irresistible urge to watch Disney's The Hunchback of Notre Dame  (the video below is the bells ringing on the tower, it may take a moment to load).


We shopped our way back to the apartment… ok, we did that every night! But it's always fun to window shop, right? And maybe pick up a few souvenirs. And some treats to take back to our puppy, of course. And some croissants for breakfast the next morning.

This is important stuff, peeps.

A good night of rest was in order, because the next morning we were off to Giverny, home of Claude Monet. Stay tuned, my friends.

Until next time, happy travels!


Thanks for reading, everyone!
Follow me on Facebook @ OurArmyLifeAccordingToTheWife
or on Pinterest, my newest obsession @ ArmyLifeFromTheWife


August 20, 2014

Spicy Shrimp Stuffed Avocados

Writing about our recent trip to Paris has made me crave some of the foods we enjoyed whilst there. On our first night, after our tour of Montmartre, we were cold and tired and hungry. Luckily, there were dozens of restaurants near our apartment. We chose one at random (I wish I remembered the name), and had a great meal.

But it was our appetizer that really stuck in my brain and just won't get out. It was creamy, a little bit spicy, and absolutely de-lish. Of course I had to recreate it!


Nom nom nom nom nom!

I love avocado anything, so this totally appealed to me. Shrimp salad stuffed inside an avocado? Heck yes! The nice thing is that you could serve this as an appetizer, but it makes a great main dish as well. The Hubs and I ate it for dinner.

I will forewarn you: This recipe is complicated. BUT, you can take some shortcuts that actually make the recipe extremely simple. For example, you can buy your shrimp already cooked. And you can use regular mayonnaise and simply add the spice to it, rather than making your own. So don't be scared, ok?

Ok, let's get this party started!

Cooking the shrimp

We'll begin by cooking the shrimp. If you choose, you can buy your shrimp pre-cooked and skip this step. I think they taste better when you do it yourself, though.

So, add 1 thinly sliced lemon, ½ thinly sliced sweet onion, and 2 tablespoons of Old Bay seasoning to a large pot of water. Bring it to a boil. Allow to boil for 5 minutes, then add 2 pounds of uncooked shrimp with the shells on (cooking with the shells adds extra flavor). Continue to boil for 4-6 minutes, until the shrimp are done. Then immediately plunge the shrimp into an ice bath. This stops the cooking process. You don't want your shrimp to become overcooked and rubbery.

When the shrimp have cooled sufficiently, you can peel them and set them aside for later use.

Next, we'll make our mayo. Again, you could purchase regular mayo and add seasoning to it rather than making your own. But it won't taste quite the same. And this isn't as hard as you think it is, I promise! Here's what you need:

Spicy mayonnaise ingredients 


As usual, I forgot an ingredient in the picture. Whoopsie! (You also need 1 chipotle pepper in adobo sauce). I highly recommend the use of a food processor for this task. You can make this with an immersion blender as well, or the really brave can whisk by hand. But that adds unnecessary difficulties to your life.

To your food processor add 1 teaspoon of paprika, ¼ teaspoon cayenne pepper, 1 chipotle pepper in adobo, 1 large egg (at room temperature, very important!), 2 egg yolks (also at room temperature), ½ teaspoon dijon mustard, ¼ teaspoon salt, and 2 tablespoons of fresh lemon juice. Whirl it all around until the mixture is nice and creamy.


Here is my best advice for making mayo… first, make sure your ingredients are as fresh as possible. Don't use old eggs. Second, make sure all your ingredients are at room temperature before you begin. And third, when you begin adding the oil (next step), do it as slowly as possible.

Like, it's ok if this next step takes you 5 minutes or more.

With your food processor whirring away, slowly slowly drizzle in 1 ½ cups of canola oil. Begin by barely dripping the oil into the mixture. If the oil doesn't properly incorporate, then your mayonnaise will break. That is no good, my friends. As you drizzle in the oil, you'll notice your mixture thickening. This is good! Once you've added all of the oil, your mayo will look something like this:

Spicy mayonnaise
Yum! Again, you could always spice up the mayo you already have in your fridge. But once you try this, you'll see how easy it really is and you'll never go back. The depth of flavor is worth it.

You're almost done now… Add 1 cup of the spicy mayo to your shrimp. The mayo actually yields about 1 ¾ cups, so I save the extra and use it on sandwiches during the week. You can also drizzle a bit extra over your dish once it's complete, if you'd like a little more sauce. Also stir in 1 diced bell pepper, 2 stalks of diced celery, and 1 finely minced shallot.


The rest is all assembly. Cut your avocados in half and remove the pits, then gently scoop out the pulp in one piece. I totally should have taken pictures of this process, but I was so excited to eat that I forgot! Luckily, Real Simple has an easy tutorial you can follow.

Fill the hole left by the pit in your avocado with the shrimp salad. Put a big old heaping scoop in there! Sprinkle a little cilantro on top, and serve with a salad on the side. My salad contained some spring mix, grape tomatoes, and radishes. Add a lemon wedge to the plate too.


Mmmmmm….. you're all ready to eat! Slice up your avocado and eat with the salad, squeezing the lemon wedge over the top of everything.

I'm so happy I can take myself back to Paris with just a bite of this dish. As always, the standard recipe is below. I'll be back soon with more tales of our adventures in the City of Lights. Until next time, happy cooking!


Thanks for reading, everyone!
Follow me on Facebook @ OurArmyLifeAccordingToTheWife
or on Pinterest, my newest obsession @ ArmyLifeFromTheWife

Email me: armylifefromthewife@gmail.com


Spicy Shrimp Stuffed Avocados

Ingredients:

For the shrimp:
2  lbs. uncooked shrimp, shell on
1 lemon, thinly sliced
½ sweet onion, sliced
2 tablespoons Old Bay seasoning
2 stalks celery, finely diced
1 small shallot, minced
1 red pepper, finely diced

For the spicy mayo: (all ingredients must be at room temperature)
1 teaspoon paprika
¼ teaspoon cayenne pepper
1 chipotle pepper in adobo
1 large egg
2 egg yolks
½ teaspoon Dijon mustard
¼ teaspoon salt
2  tablespoons fresh lemon juice
1 ½ cups organic canola oil

To serve:
4 avocados
2 pints grape tomatoes
Spring mix
1 lemon, cut into 8 wedges
1 bunch radishes, julienned
4 tablespoons cilantro, for garnish


Directions:

To cook the shrimp: Add 1 lemon (thinly sliced), ½ sweet onion (thinly sliced), and 2 tablespoons of Old Bay seasoning to a large pot of water. Bring water to a rolling boil. Allow to boil 5 minutes, then add the shrimp to the pot. Boil for 4-6 minutes, until the shrimp are done. Remove immediately and plunge into an ice bath to stop the cooking process. Once the shrimp has cooled, peel and set aside for later use.

To make the spicy mayo: Add all the ingredients except the oil to a food processor. Blend until smooth. With the food processor running, very slowly drizzle in the oil. It should take at least 5 minutes to drizzle in all of the oil. If this is done too quickly, then the mayo will not emulsify and it will break. Whir in the food processor until creamy.

For the shrimp salad: Mix the cooked and cooled shrimp with one cup of the spicy mayonnaise (save the remainder of the mayonnaise for use on sandwiches, etc). Stir in the red bell pepper, celery, and shallot. Set aside.

To assemble: Slice the avocados in half and remove the pit. Gently run a spoon around the edges of the avocado and scoop out the pulp in one solid piece. Place on a plate and fill the hole in the avocado with shrimp salad to overflowing. Sprinkle cilantro on top of the shrimp salad. Garnish the plate with a small salad of spring mix, grape tomatoes, and radish. Serve with a lemon wedge (this should be squeezed over the avocado and salad. They should be eaten together). 


August 19, 2014

Keep Calm and Go To Paris, Part 2

If you've been keeping up, then you've already read Part 1 of this series…

I'll just assume we're on the same page here, shall I?

Th next morning dawned bright and early. And rainy. The Fam and I enjoyed an easy breakfast in our apartment, fresh fruit and cheese and bread and jam. This is the good life, peeps! Our plans included a free walking tour of Paris, and (this is the best part) a trip to the top of the Eiffel Tower! 

Waking up with a cappuccino 

We slowly made our way to the tour meeting point, window shopping along the way. The weather was dreary. Paris is well-known for it's drizzly rain. Rather than be sad, we rejoiced that we were getting a "real" Paris experience. And we stopped for a cappuccino to warm us up. That always helps. 

Here's a tip for cafes in Paris that you may not know: Often, the price of your espresso or cappuccino (or whatever) is based on where you order the item. For example, the price will be significantly cheaper if you order at the bar (standing) versus sitting and ordering from the cafe tables outside. If you're looking to save a bit of cash, this is handy! 

Waiting for walking tour 
I'd taken the free walking tour once before, during my 12 hour whirlwind trip, and I loved it! The tour includes a lot of the major sights like Notre Dame, the Louvre, the love lock bridge, and much more. Usually the guides are humorous and have plenty of local color that adds to the tour.

Sadly, my second go round with this tour was not nearly as good as the first. In fact, it was pretty boring. I was honestly surprised since I've taken many of the Sandemans tours in other cities and never had this problem. I'm hoping it was just a fluke (and I'm pretty sure it was). The Fam and I tagged along with the tour for a while, but eventually left and did our own wandering.

Notre Dame
Love Lock Bridge (aka: Pont des Arts bridge)
Just before our visit, the "love lock" bridge actually lost a few sections of railing where the weight of the locks is causing decay and crumbling. Parisian officials are now encouraging people to take "selfies" versus the popular locks. In fact, there is a whole website now dedicated to Love Without Locks.

Crumbling railings 
There is no punishment for the continuation of the love lock tradition, but I suspect that someday soon this will no longer be allowed. 

In our wanderings we headed toward the Eiffel Tower, stopping for lunch at a great little cafe. Here's another tip for any of you visiting the city: Cafe tables and chairs must leave a certain amount of available space on the sidewalk. This often means that chairs are side by side, instead of facing each other across the table. Whatever you do, don't move the chairs around unless you want to be fussed at by an irate employee. 

Sitting side by side for lunch

Also, don't order "French" onion soup in Paris. Ahem… it's just onion soup there, peeps. 

No one is to talk about how I made this mistake, ok? Learn from me, my friends. It was pretty embarrassing when the waiter says to me (in perfect English), "You mean the onion soup?"

ANYWAY. 

After lunch, it was almost time for our tour to the top of the Eiffel Tower! 

Under the Eiffel Tower, about to go up! 

You can order tickets online in advance, but we chose to do a tour for this visit. We used Easy Pass Tours, and we weren't disappointed. The price is definitely higher than a regular ticket. I had several reasons for this purchase. First, there were no tickets left online when I tried to book in advance (biggest reason, ha!). Second, I thought The Kid would enjoy hearing the history of the tower, and a description of what you see from the top. Our guide was very friendly, and the tour included some great information. Best of all, he was willing to take pictures of us together at the top! 


Eiffel Tower

Despite the rain and the fog, we loved our visit to this iconic monument. The official tour was 2 hours long. But we stayed quite a bit longer. There were vendors and gift shops to explore, and even champagne available for purchase. I found the champagne to be highly overpriced, but we enjoyed a nice hot chocolate that went perfect with the cool weather. 

View from the Eiffel Tower 

The next morning we had a planned excursion to Versailles. After another lovely meal in Paris, it was back to bed for a bit of sleep before a new adventure. 

I'll be back soon with the next installment in this series. Until then, happy travels! 


Thanks for reading, everyone!
Follow me on Facebook @ OurArmyLifeAccordingToTheWife
or on Pinterest, my newest obsession @ ArmyLifeFromTheWife


August 15, 2014

DIY Eiffel Tower Cake Topper

A couple months ago, I took a quick 12 hour trip to Paris with one of my neighbors, her daughter, and my pal Becky. I absolutely loved Paris! In fact, I went back with The Fam just a few weeks ago for a longer, 5 day trip (you can check out the first installment of my Keep Calm and Go To Paris series if you want!).

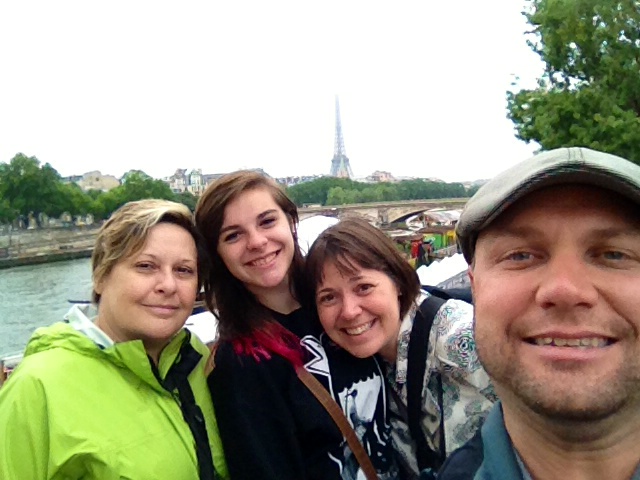
Our 12 hour whirlwind was an early birthday present for my friend's daughter, Jaden. She wanted to see Paris, and especially the Eiffel Tower, more than anything.

Hanging in Paris 

Now that her actual birthday date has rolled around, her mom wanted to commemorate that trip with the cake.

Before we get started, let me tell you that I am definitely not a pro at cake decorating. My only experiences are the cakes I make the Hubs every year for his birthday. But that's why this post is so great for the average person like me. Seriously peeps… if I can do this, you totally can too! It's super basic.

Eiffel Tower cake

See, it doesn't look too complicated, does it?

The cake is a standard box mix. And the icing is the kind you buy in a can at the grocery store. The only technique here is a bit of flair with the icing and creating a chocolate Eiffel Tower on top. Lemme show you how to make the tower...

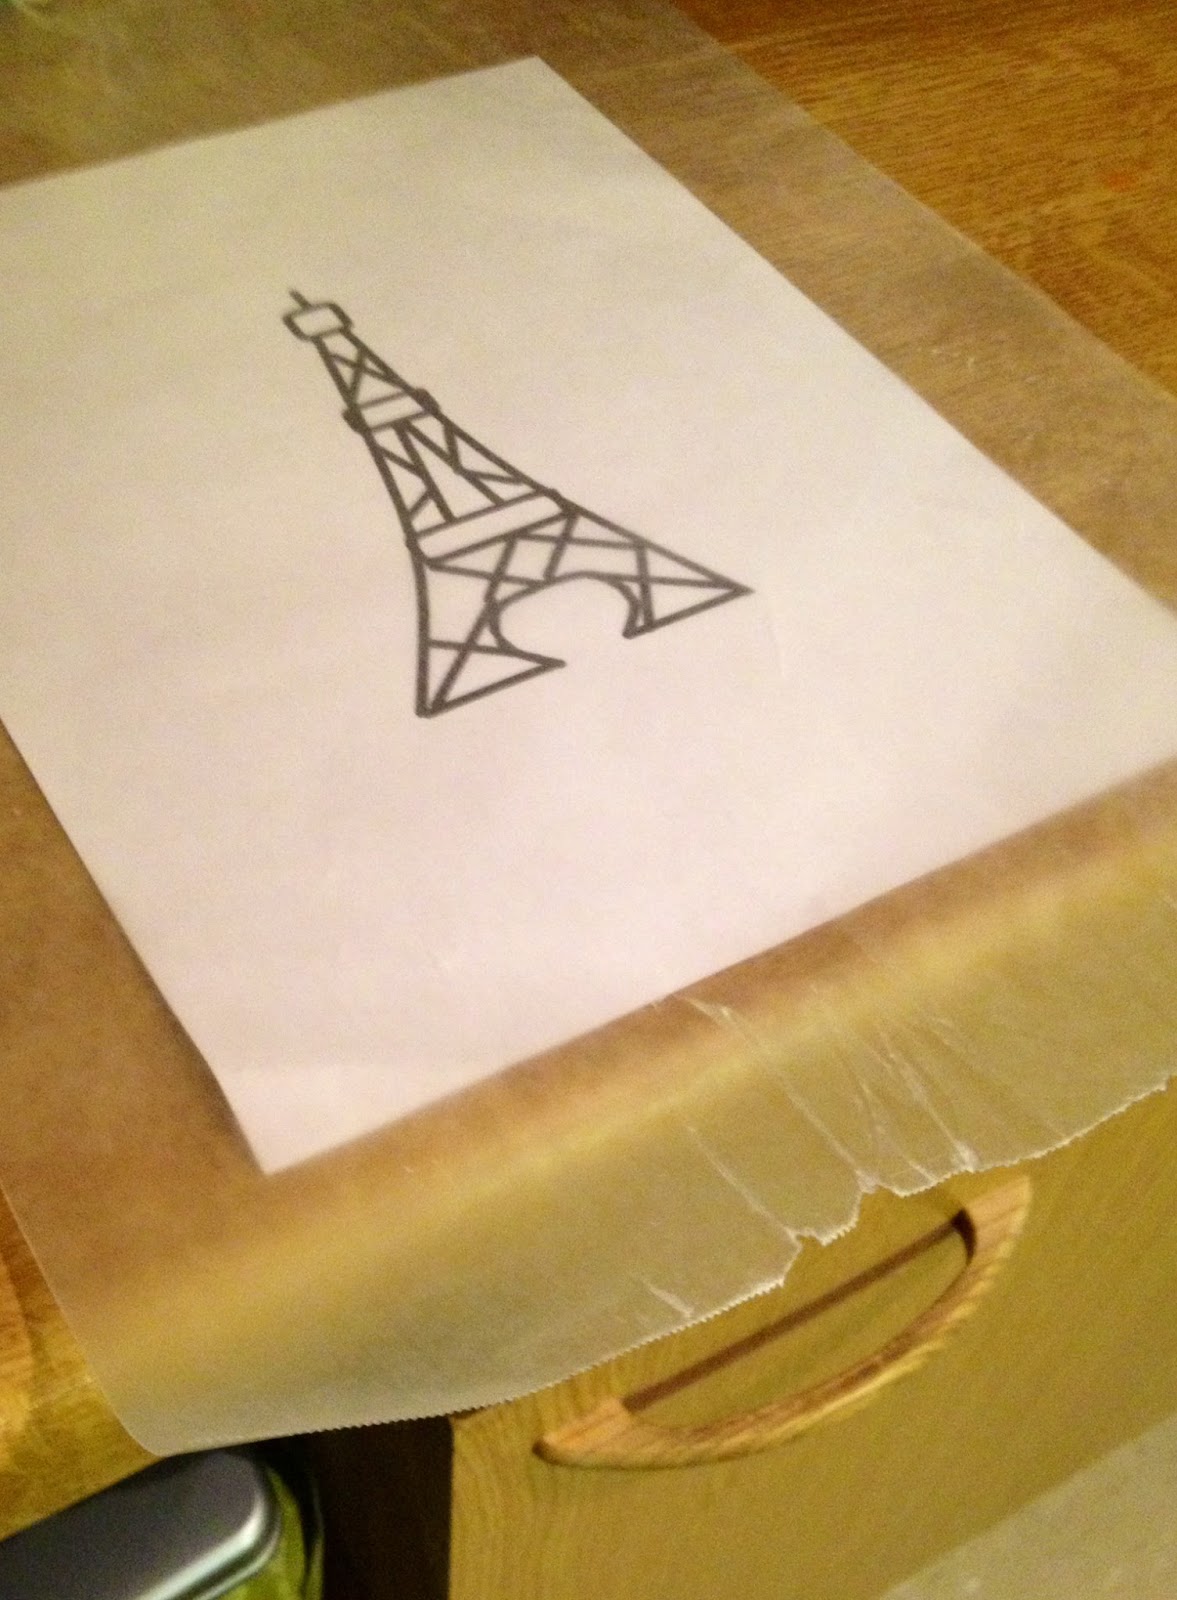
I began by looking for images that I could trace in chocolate. I found this one that worked well, but I had to print it in several sizes until I found the one that would work on top of this cake. If you were doing a sheet cake, you could easily choose a larger size to work with. Download the PDF file here if you want to try it yourself.

Eiffel Tower template


Once you print out the appropriate size, lay a piece of wax paper over your image. Then (this is important, peeps!), tape the paper down to your countertop to prevent it moving while you trace.


You'll notice that the wax paper allows you to still see the image well. You can use this technique with any image you want on a cake, not just the Eiffel Tower here.

Fill a piping bag with some melted and slightly cooled chocolate. Couple tips:

1. If you don't have a piping bag, use a ziploc bag with a small piece snipped off the corner.
2. The chocolate will be quite warm, so wear some kitchen gloves.
3. If you don't have kitchen gloves, you can do what I did… use your winter mittens!
4. Practice piping on a spare piece of wax paper before tackling your design. It's not hard to do, but this will give you a feel for how fast the chocolate will come out, etc.
5. Your chocolate doesn't have to be fancy. I used plain old chocolate chips that I melted over low heat.

Then, trace your design with your chocolate "ink".


Easy, yes?

Then, let your chocolate cool. I use the fridge for mine, it speeds things up a bit. Very carefully remove the design after it has hardened, and place it on the cake. The bottom side of the chocolate will be quite smooth, without the lumpiness you see above. Place that side up on your cake for a nicer look.

I was making a small tower, so it was easier to remove in one piece. If you're making a larger cake, I suggest making your tower in sections. Print several images and trace only a section of each. When putting it on the cake, put the pieces together like a jigsaw puzzle.


See! You can totally do this.

I added some detail with a set of piping tips and colored icing, and then I sprinkled some pink sugar pearls on top. Easy peasy, my friends.

Do you have any tips for DIY birthday cakes? Share below in the comments!

Until next time my friends, happy baking!


Thanks for reading, everyone!
Follow me on Facebook @ OurArmyLifeAccordingToTheWife
or on Pinterest, my newest obsession @ ArmyLifeFromTheWife


August 14, 2014

Keep Calm and Go To Paris, Part 1

This all began with a simple phone conversation… "Kid, where is the one place you really want to go this summer?"

The answer? Paris.

Seriously, what 15 year old doesn't want to see Paris? I should have known. Thanks to a great deal through Air BnB, we could stay for 5 whole days. The Kid was thrilled! I gotta admit, I was pretty excited too. There is so much to see and do in Paris, I don't think I'll ever check it all off my list. I already have plans to go back again in December with one of my other siblings.

Eiffel Tower view

This will be a several part series, because we saw too many things to cram into only a single post. I'll include as many links and tips as I can, of course. I scouted for this trip during a quick stop (12 hours only!) a few months ago. I decided then and there to stay in a flat versus a hotel room. I wanted The Kid to have as authentic an experience as possible.

The view from our apartment

Our apartment was a five flight walk up, but totally worth it. I figure the extra exercise made up for the pastries and macaroons we ate all week long! The great thing about an apartment is the kitchen. Eating in Paris is quite pricey, so saving on meals is huge. There was a small grocery just down the road that we stocked up at. Even in a tiny shop like that, the cheese aisle made me swoon!

Cheese aisle at French grocery store

Of course, the price of peanut butter was outrageous! We hadn't planned on buying it anyway (we stuck to local food where we could), but I had to take a picture…

Euro price for travel-sized peanut butter


That jar was tiny too!! Like, travel sized. It's crazy, I tell you, crazy!

Anyway.

We arrived in Paris by train (traveling from Kaiserslautern to Paris for 100 Euro each, round trip) and then took the metro to our apartment. The metro system is wonderful. It's simple to use, inexpensive, and can really save your feet on a trip to this city. Even with the metro, we walked miles everyday. You have a lot of ticket options, from a several day pass to purchasing individual tickets. We chose an option in between these two, and it worked out very well for us. At the ticket counters, you can purchase books of 10 metro tickets (at a discount, of course). This is less expensive than purchasing all your tickets individually. We did consider buying the unlimited pass. However, we only used the metro once or twice a day since the attractions are often close together. So the unlimited pass made no sense for us at all.


After a quick meal of sandwiches (and some people watching from our window!), we left on a great little tour of the Montmartre district. This was absolutely one of our favorite things in Paris! Actually, it's probably one of our favorite tours from the entire summer. And the price seriously can't be beat.

Lunch and people watching
The Montmartre district includes the infamous Moulin Rouge (the red windmill). You can still see shows here, of course, but they are pricey. Our tour included a walk by this site, and some of it's history. Our guide was wonderfully funny, and full of interesting facts and stories. We learned of the artists that once lived here, such as Pablo Picasso, Salvador Dali, Vincent Van Gogh (a personal favorite), and Amedeo Modigliani. We visited the Basilica of Sacré-Cœur, and admired the amazing mosaics inside. The tour included many helpful tips for dining out and exploring. This is a must-do!! The guides change regularly so your experience may be different than ours, but the Montmartre district will always remain one of the best places I've been.

Montmartre tour 
By this time, we were worn out! Being Paris, we enjoyed dinner at a great restaurant close to our apartment. The food here is simply amazing, I highly encourage you to try something new at every meal. We sampled an Avocado Shrimp salad that was divine. I'm still dreaming about it, actually.

Then it was off to bed… we needed rest for the busy day that awaited us the next morning! I'll be back soon with more tales of our adventure. Until next time my friends, happy travels!


Thanks for reading, everyone!
Follow me on Facebook @ OurArmyLifeAccordingToTheWife
or on Pinterest, my newest obsession @ ArmyLifeFromTheWife