Showing posts with label Cheese. Show all posts

May 10, 2014

Girls Night In!

Have you ever seen the movie Last Holiday, starring Queen Latifah? If the answer is no, you should probably watch it. Especially if you like fluffy girl movies. Which I do.

Anyway! I thought this was a cute movie. I was watching it one night shortly after we moved to Germany, when I suddenly realized… 

… much of this movie takes place, and was filmed, only a few short hours away from where I'm currently living!! Do you know what this means???

I can go visit there! And I totally did. Don't worry, I'll tell you all about it soon. 

You probably think I'm nuts, but little things like this excite me. I got my friends all stirred up about it too, so they came with me. Before the trip, we decided to have a girls night in with food and wine, and a showing of the movie. 

Fun, yes? 

Meat and veggie platters

Cheese tray from around the world

Chocolate fondue and dippers! 

We piled our plates high, poured ourselves some wine, and snuggled down with fuzzy blankets to watch the show. Much of the movie takes place in Karlovy Vary, a spa town in the Czech Republic. We loved exploring this town, and I'm excited to share all the stories and pics with you! 

In the meantime, I'm passing along my chocolate fondue recipe to you, in case you'd like to host a Girls Night In yourself...

This recipe is super simple. In your electric fondue pot (if you're using a sterno candle, then do this in a double boiler first and transfer to your fondue pot), combine the following: 12 ounces semi-sweet chocolate chips, 12 ounces milk chocolate chips, 2 cups heavy cream, ½ teaspoon salt, 2 tablespoons vanilla extract, and 2 tablespoons butter. Warm over low heat until melted and smooth. Then dip your favorite stuff into the chocolate, and enjoy! 

As always peeps, the standard recipe is below. And I've included a list of "dipper" suggestions too. Until next time, happy cooking! I'll be back soon with the details from our trip, so stay tuned.  


Thanks for reading, everyone!
Follow me on Facebook @ OurArmyLifeAccordingToTheWife
or on Pinterest, my newest obsession ArmyLifeFromTheWife


The Standard Form:


Basic Chocolate Fondue

Ingredients:
12 ounces semi-sweet chocolate chips
12 ounces milk chocolate chips
16 ounces (2 cups) heavy cream
½ teaspoon salt
2 tablespoons vanilla extract
2 tablespoons butter

Directions:

If you’re using an electric fondue pot, turn the heat on low. Add all ingredients to the pot and stir until melted and smooth. Serve with your favorite dippers.

If you’re not using an electric fondue pot, melt the ingredients together in a double boiler. Once smooth, transfer to your fondue pot and keep warm with a sterno.


Dipper Suggestions: Marshmallows, pound cake, strawberries, bananas, graham crackers, pretzels, salty potato chips, cooked bacon, brownie bites, maraschino cherries, apple slices, pineapple, biscotti, soft caramels, meringue cookies

April 29, 2014

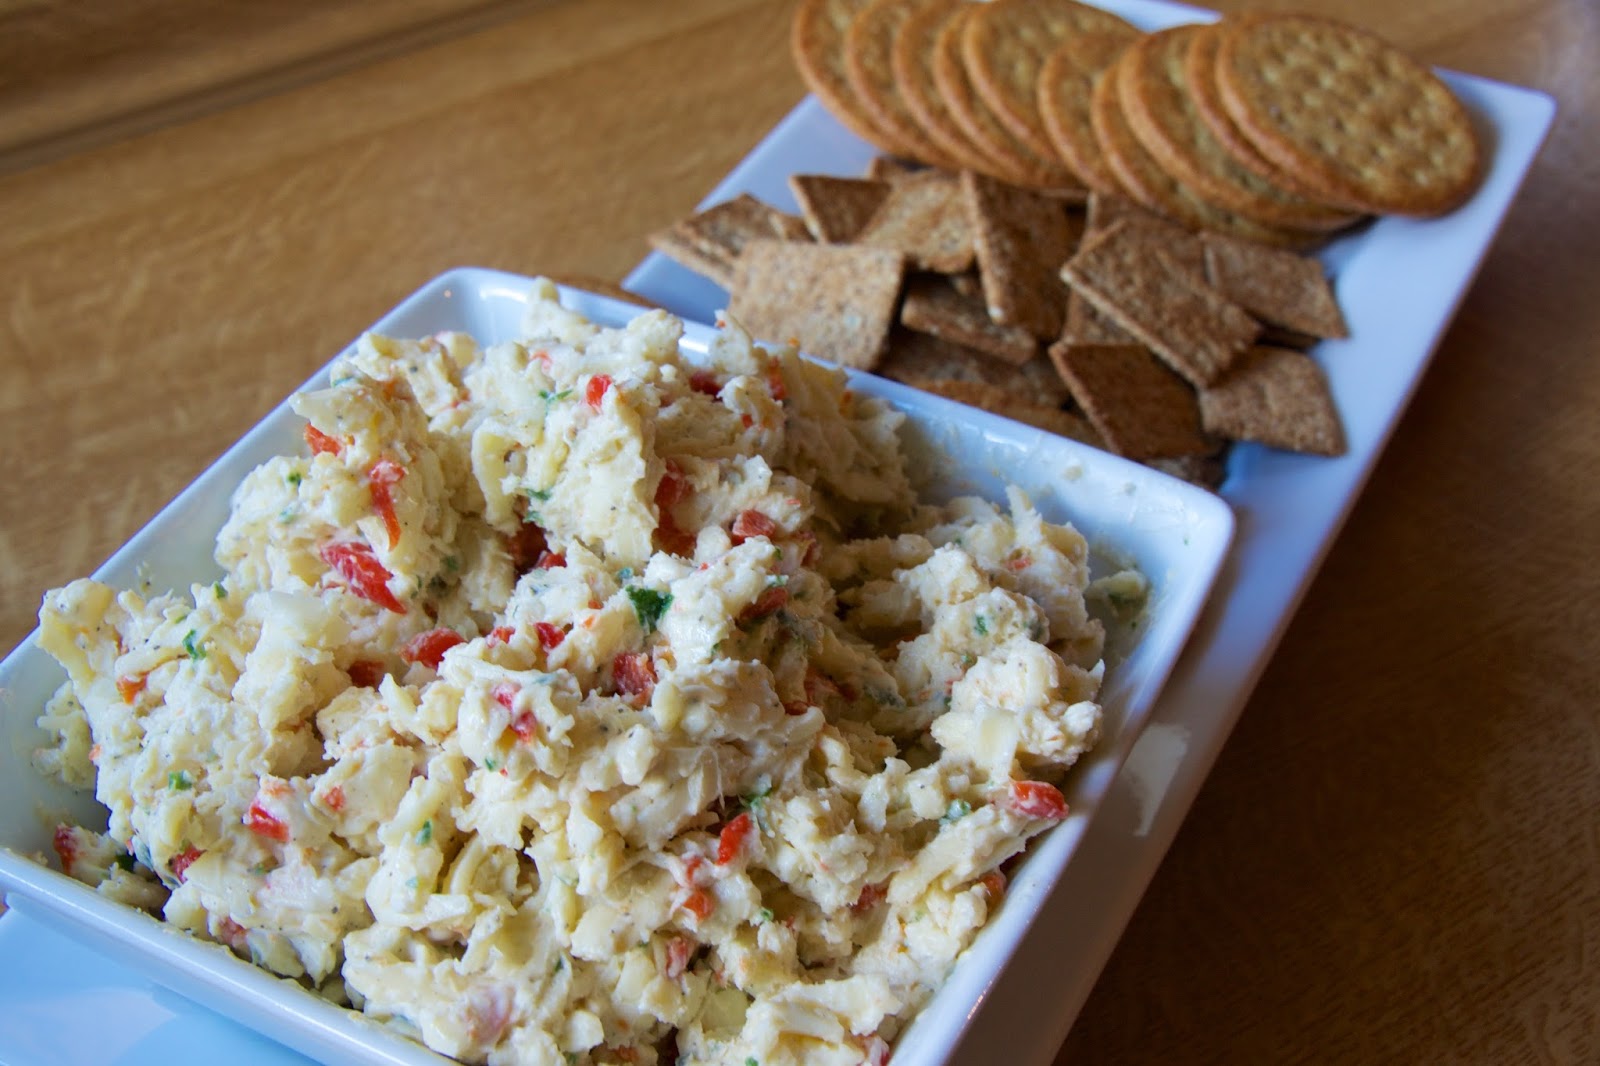
White Pimento Cheese Spread

When you move around a lot, you start missing things from all over the world. Of course, I always miss  the food! And places. And cool shops. And a whole host of other things.

But mostly the food. And the people.

You feel me here, peeps? I miss Mexican food from El Paso, and crumb cake from New York. I already have a list of things I know I'll miss from Germany. One of the things I crave the most comes from the town I grew up in, in Virginia. A local company made a "gourmet white pimento cheese spread" that was absolutely to die for.

Like the crumb cake, the cheese couldn't be shipped. Something had to be done! So I re-created it at home, and now I eat it whenever I want.  

White Pimento Cheese Spread

Because that's how I roll.

Oddly enough, I used to be prejudiced against pimento cheese. I thought it was weird. But then I tried the "gourmet" version, and I was hooked. I bet you will be too. Come on, give pimentos a chance…

The ingredients are pretty basic:

The ingredients

And the method is pretty easy. Start by mixing a few spices into ½ cup of mayonnaise: ¼ teaspoon salt, ¼ teaspoon pepper, and an ⅛ teaspoon garlic powder.


Then, whip 3 ounces of cream cheese until it's all light and fluffy. I do this with my hand mixer, the process is much quicker this way. Blend your mayo mix into the fluffy cream cheese.


This goopiness may look weird, but it's the binder for your cheeses and it's going to taste delicious when everything is put together, I promise. The most important ingredient in your spread is the cheese. Don't by the pre-shredded stuff, people! Grate your own, it's worth it. Trust me.

So, to your goop, add 2 cups of freshly grated white cheddar cheese. You can use the yellow kind, but then it wouldn't be white pimento cheese anymore. The white cheddar has a slightly different flavor too, try it one time and you'll see.

Also add 1 cup of freshly grated Monterey Jack cheese, and ¼ cup of fresh grated Parmesan. Grate the Parmesan on the littlest hole of your grater, kay? Also on the smallest opening, grate 2 teaspoons of onion.

The smallest grater side

Stir in 2 tablespoons of minced green onion as well, and 1 jar (4 ounces) of diced pimentos, drained of the liquid.

Mix it all around, and viola! White pimento cheese. I suggest chilling the mixture for at least 2 hours before serving, but you don't have to. To be honest, I always taste test a couple bites before the cheese makes it into the fridge. Don't tell!


I make this for parties, or weekend snacking. Or weeknight snacking. And I always make a double batch, because the Hubs is a pimento cheese hog. If you want to spice things up a little, try adding a bit of minced jalapeƱo to the mix.

Until next time, happy cooking!


Thanks for reading, everyone!
Follow me on Facebook @ OurArmyLifeAccordingToTheWife
or on Pinterest, my newest obsession ArmyLifeFromTheWife


The Standard Form: 


White Pimento Cheese Spread

Ingredients:

½ cup mayonnaise
¼ teaspoon salt
¼ teaspoon black pepper
1/8 teaspoon garlic powder
3 oz. cream cheese, softened
2 cups sharp white cheddar cheese, grated fresh
1 cup Monterey Jack cheese, grated fresh
¼ cup Parmesan cheese, grated fresh
1 (4 oz.) jar pimentos, drained
2 teaspoons finely grated onion
2 tablespoons green onions, minced

Directions:


Mix the garlic powder, salt, and black pepper with the mayonnaise. Beat the cream cheese until light and fluffy, then add the mayonnaise mixture to it and beat until well combined. Stir in all three types of cheese, the grated onion, pimentos, and green onions. Mix until well blended. Chill before serving. Serve with crackers, or as a sandwich.

February 25, 2014

Dark Chocolate and Gouda Puffs

A few weeks ago, my friend Becky was visiting me from the other side of Germany for a girls' weekend. This generally involves lots of shopping, perhaps some photo taking (we're both obsessed), chick flicks, plus food and wine.

We spent plenty of time at my favorite place, Ikea (the happiest place on earth!), and we also managed some time to shop in downtown Neumarkt in der Oberpfalz.

Downtown Neumarkt in der Oberpflaz

We noshed at a few cafes during her stay, but the best part of the weekend (food-wise) was a new recipe I've been dying to test out. You see, I love chocolate. And I love cheese. And, of course, wine.

I thought, why not pair these things together? So I did. And it was magic.

Dark Chocolate and Gouda Puffs

Nom.

Nom nom nom nom nom.

Seriously.

Pair these puffs with a glass of red wine, and suddenly you've got a perfect dessert or appetizer. You can add variety with different cheeses and various toppings. Our favorite was gouda cheese and dark chocolate topped with slivered almonds and some sea salt. But I'm going to show you a multitude of ways to put your own spin on this recipe.

Ready? Good.


Here's what you need to get started: 1 box of puff pastry, 8 ounces of cheese, 1 bar of dark chocolate (at least 65% cacao), an egg, 1 tablespoon water, slivered almonds, plus some sea salt and raw sugar.

These are the basics. But you have so many options. For example, Becky and I tried 3 types of cheese, including Gouda, Brie, and Camembert. We also tried several types of chocolate, though they were all dark. We varied our toppings as well. Some puffs were topped with almonds, some were not. Some were sprinkled with sea salt, others with sugar. Options, people!

Ingredient choices

Begin with your puff pastry. Allow the box to thaw on your counter for about 30 minutes. You want the pastry to be workable, but not so soft it's falling apart everywhere. While it's thawing, line 2 baking sheets with parchment paper.

Remove both sheets of pastry from the box and unfold gently. The pastry has several fold lines in it, but that's ok, we're going to use them to our advantage.

Puff pastry. Notice the fold lines?

Each sheet of pastry will yield 12 squares. Cut along the fold lines to begin. Then cut each length into 4 even pieces. Do this for both sheets of pastry.

Puff pastry after cutting

The picture above picture is what your pastry should look like after you've cut it. 24 squares will equal 12 total puffs when finished.

Next, enjoy a sip of wine to reward yourself for a job well done.

Now it's time to add the chocolate. When choosing your chocolate, pick a dark, bittersweet bar, at least 65% cacao. You could try milk chocolate as well, but I think this would be too sweet to pair with the cheese. Most chocolate bars are divided into squares. I chose one with at least 12 squares, as this made dividing among my pastry easy.


Lay 12 pieces of the puff pastry onto your cookie sheets. I originally began with one cookie sheet, but realized I needed two once I started sealing the pastry edges. Don't be like me, peeps! Start with two cookie sheets, 6 puffs per sheet.

On top of each square of pastry, place a piece of chocolate, and then a piece of cheese.


A note about your cheese choice: I tested several varieties. All of my choices worked well and tasted great. But the Gouda was, by far, the best. I believe this was related to the texture of Gouda as it melts. The Brie and Camembert liquify more when they melt, and the chocolate slightly overpowered them.

If you're using shredded Gouda like we did, then place the cheese on the bottom of the chocolate. This isn't necessary, it just makes your life a  bit easier, as the chocolate helps anchor the cheese when you seal the pastry.

On top of the chocolate and cheese, place another square of the puff pastry. Line up the edges of the pastry pieces and use a fork to seal, like so:

Sealed puffs

If your edges aren't sealed well, then chocolate and cheese will leak out during baking. Not cool, peeps. If you notice any tears in the pastry, seal it back together before baking. You may need to stretch the top piece of puff pastry a bit, to help it fit over the chocolate and cheese. This is ok! The pastry will be very pliable at this point, so it's not difficult to stretch it to fit.

You're almost done now!

In a small dish, whisk together an egg with one tablespoon of water. This is an egg wash. Brush this over your puffs. Why do we do this, you wonder? Because the egg wash will make the top of your puff pastry golden and delicious during baking. It also helps the toppings stick better.

Trust me here, peeps.

After the egg wash, sprinkle on the toppings. I like using slivered almond pieces, because I think the dish needs a crunch factor. But you can easily leave these off if you don't like nuts. I left them off some of my puffs for Becky.

On top of the almonds, you can also sprinkle either some raw sugar or sea salt. I personally liked both. I think with a saltier cheese, I would choose the sugar. And with a milder cheese, I would choose the sea salt. Up to you! Another option would be to leave out the salt and sugar entirely, then dust the pastries with powdered sugar after they have cooked and cooled.

Puffs sprinkled with almonds, sugar and/or salt
Pop these babies into a preheated 375 degree oven for about 14-20 minutes. Check them often, ok? Ovens vary quite a bit, and you wouldn't want yours to burn. You'll know they are done when the pastry if puffy, golden brown, and delicious looking. Cool slightly before serving, the filling will be hot!

Dark Chocolate and Gouda Puffs with slivered almonds and sea salt

These are perfect for dessert or even as an appetizer. You could make them even smaller by cutting the squares in half again and halving your filling as well. I served mine with a glass of red wine and a side of green grapes. The grapes were the perfect palate cleanser between bites.

Becky and I enjoyed trying the different varieties, and they were all delicious. Here is a list of our combinations:

Brie and dark chocolate with sea salt (both with and without almonds)
Brie and dark chocolate with raw sugar (both with and without almonds)
Gouda and dark chocolate with sea salt (both with and without almonds)
Gouda and dark chocolate with raw sugar (both with and without almonds)
Camembert and dark chocolate with sea salt (both with and without almonds)
Camembert and dark chocolate with raw sugar (both with and without almonds)

As always, I've included the standard recipe below! Experiment and see what combos you like best, and then send me your photos and tips. I'll be back again soon with some new recipes.

Until then, happy cooking, peeps!


Thanks for reading, everyone!
Follow me on Facebook @ OurArmyLifeAccordingToTheWife
or on Pinterest, my newest obsession ArmyLifeFromTheWife


The Standard Form:

Dark Chocolate and Gouda Puffs

Ingredients:
1 box of frozen puff pastry
1 bar of dark chocolate (divided into 12 squares)
8 ounces Gouda cheese, cut into 12 pieces
1 egg
1 tablespoon water
Slivered almonds, for garnish
Sea salt, for garnish
Raw sugar, for garnish

Directions:

Preheat oven to 375 degrees. Line two cookie sheets with parchment paper.

Thaw puff pastry for 30 minutes. Remove from packaging and slice each sheet into 12 even squares (do this by cutting along the 3 fold lines, then cutting each of those strips into 4 even pieces).

Place 6 pieces of pastry on each cookie sheet, a few inches apart. Place 1 piece of cheese onto each piece of pastry. Top with one square of chocolate per pastry piece. Top with another piece of puff pastry, and seal the edges with a fork.

In a small dish, whisk together the egg and one tablespoon of water. Evenly brush this egg wash over the pastry squares (12 total). Sprinkle with almonds, and either sea salt or raw sugar.


Bake in preheated oven for 14 – 20 minutes, until puffy and golden brown. Cool a few minutes before serving.   


March 11, 2013

Blackberry Basil Grilled Cheese

Yep, you read the title correctly. Sounds a little weird, I know.

But weird or no, it's also DELICIOUS. Trust me here, peeps. Have I ever steered you wrong?

I found this excellent flavor combination on Pinterest. And then I started experimenting to see if I could re-create the fabulous picture which set my mouth watering.

Turns out, I can.


And so can you!

The ingredients are basic, and the method simple. Even the Hubs could make this yummy grilled cheese (not that he actually will, but he could. In theory). This was so good I, ahem... tested it several times, with different variations.

Let's get stated with the ingredients:


I know this doesn't look like my regular ingredients photo, but it's because I tried this several times. The first time, I used Italian bread, Monterey Jack cheese, blackberries, basil, and butter (for the bread). The second time around, I changed the cheese and bread. And the butter. (But I only changed the butter because our commissary started stocking Kerrygold, which is pretty much the best tasting butter you can get here in the States... that I've tried so far).

The word you're looking for is... ANYWAY.

Ahem. Back to the recipe.

What I've discovered is, this recipe is highly versatile. Naturally I have a few tips for you. But for the most part, this dish is pretty impossible to screw up.

SO. The bread. You can pick your favorite, but choose a thicker cut. You definitely don't want a skinny mini bread. The blackberry juice and gooey cheese will disintegrate a bread that is too thinly sliced. I found that I prefer to thickly slice my own French bread (Quick tip: If using French bread, you often find air pockets in the slices. Try to avoid them so your cheese doesn't melt through).

Next, the cheese. Again, choose your favorite. I found the Monterey Jack was quite good, but the white cheddar was a-maz-ing. I really like the zing and the sharp kick from the white cheddar. I might try this again with Asiago or Stilton. Oooh, or Brie. Have fun with it!

Now that you've got your cheese and bread (both essential to a grilled cheese), let's deal with the blackberries. Place the blackberries (6 oz) in a bowl with high sides. Why the high sides? Because we're going to squish those babies, and they splatter!

Use your fork to mash the blackberries, like so:


Don't completely pulverize the berries, but squish them up so they're not too chunky. I'm way technical, right? Ha.

Now it's time for the basil. Here again, you have choices. I prefer to chop my basil (about 15 leaves) and stir them into the blackberries:


You could also leave the basil leaves whole, and simply layer them on your sandwich later. This will still taste yummy and look pretty, but I find it harder to eat the grilled cheese with whole basil leaves.

With all the prep work done, this grilled cheese comes together in a snap!

Butter your bread, and warm your skillet over medium-low heat. Place two slices of bread in the skillet, butter side down. Add a single layer of cheese, and then top with a few tablespoons of the blackberry mixture. If you chose to leave your basil whole, then top the blackberries with a few basil leaves:

Blackberries with basil mixed in, and blackberries with whole basil leaves

Add another thin layer of cheese, then top with a piece of bread (Without the additional layer of cheese, the blackberries will soak your bread. Make sure there is something between your fruit and the bread!).

Do you want to know the best way to get a perfectly toasted grilled cheese sandwich?

Leave it alone!

I know you may be tempted to move your sandwich around in the pan, or smash it down with your spatula. But please, please resist those urges. Your bread may stick a bit at first, but it will loosen... I PROMISE.

As the bread toasts, it will unstick from the pan. And that's when you know it's time for the flip. Wait patiently as the other side toasts as well. Don't turn up the heat, or any other crazy thing. The sandwich will cook about 3-5 minutes per side.

And, viola!

Enjoy the ooey gooey deliciousness that is Blackberry Basil Grilled Cheese.


Yes, it really is that simple. Like I said, so simple even the Hubs could do it.

Happy cooking, my friends! Please let me know if you try this with other cheeses or fruits, and how it turns out. As always, the traditional recipe is below.


UPDATE: Recently, I made this grilled cheese again, substituting the blackberries for blueberries. The result? YUM! 


Thanks for reading, everyone!
Follow me on Facebook @ OurArmyLifeAccordingToTheWife
or on Pinterest, my newest obsession ArmyLifeFromTheWife


Blackberry Basil Grilled Cheese

Ingredients:

6 slices of your favorite bread (I prefer French)
6 ounces fresh blackberries
15 basil leaves (either chopped or whole)
10 ounces cheese, thinly sliced  (your favorite, I prefer white cheddar)
Softened butter

Directions:

Butter one side of your bread slices, then set aside. Smash the blackberries with a fork. Stir the basil (if chopped) into the blackberries.

Warm a skillet over medium-low heat. Place 3 slices of the bread, butter side down, in the skillet. Add a thin layer of cheese on each piece of bread. Top with 2 tablespoons of the blackberry mixture. If leaving the basil whole, add several leaves on top of the blackberries. Finish with another layer of cheese, then top with the remaining bread slices.

Cook for 3-5 minutes per side, until the bread is golden brown and the cheese is melted.

Enjoy! 


August 28, 2012

Baked Feta Cream Marinara

Oh-em-gee... this is one of my new favorite things. It's indescribable, truly. But if I had to try, I'd say it was scrumptious. Mouthwatering. Succulent. Heavenly. Mind-blowingly delicious.

What is this magical substance, you wonder? Mmmmm..... it's Baked Feta Cream Marinara!


A few weeks ago, I had lunch with a friend at one of my favorite restaurants, the St. Clair Winery and Bistro. There are only three locations, and they're all in New Mexico. If I have an opportunity to visit, then I do... you've got to take these opportunities when you can (if you're ever near one, stop in, you won't regret it!).

St. Clair's has an amazing appetizer menu. And lunch menu. And dinner menu. Oh, and don't forget dessert! And the wine.... good gracious. I always stuff myself to the point of embarrassment, because I never know when I may be able to go back.

I finally said to myself, enough is enough! I can't always hop in the car and drive to New Mexico (especially if we're in Germany or something). I need to craft my own recipes to mimic theirs. This way, I can have Feta Cream Marinara whenever I darn well want to.

So that's exactly what I did.

And now I'm going to share it with you, 'cause I loves you. All the world deserves yummy Feta Cream Marinara whenever they want it.

Since my buddy Abby shared in the original gorge-fest, I felt it only fair to invite her for the creation of the recipe. I love it when Abby comes over, not just because we have a great time (though that's the biggest reason), but also because she brings me fabulous, yummy things... like homemade pizza crust, and Focaccia bread, also homemade.

Don't you wish Abby was your friend too??!

On this particular day, she brought me both! I stored the pizza crust for later use, but the Focaccia bread was the perfect accompaniment for our dip.

The giver of pizza crust and bread dough, Abby 

Abby's job was to prepare the bread, because this is one thing I am really not good at. I buy all my fancy bread at Tar-jey. Perhaps someday I'll brave this unknown skill, but today is not that day.

You can use any kind of bread you want... toasted French or Italian would work well, even breadsticks.  I had a baguette on hand, but set it aside when I saw the Focaccia. If you don't have an Abby to bring you fresh bread, then I suggest the baguette. Slice it thin, and toast on one side. The slices make a great scoop for the warm dip.


As you can tell from the ingredient picture, I snapped this before Abby and the bread arrived. That's why you still see my sad, store-bought bread. Don't worry though, I found another use for my Tar-jey baked goods.

This recipe turned out to be super, easy simple. You'll need a jar of good quality marinara, or use your own. I was in too big a hurry for the homemade part. You also need 6 ounces of crumbled feta cheese. Get the good stuff!  We've had this conversation before. The picture shows a whole block of cream cheese, but you only need 2 or 3 ounces.

The oregano is optional: I used it to jazz up my jar of marinara. You don't have to do that if you don't want to. But if you do, just pluck the leaves, chop them up finely, and stir them into your sauce. Easy peasy.

Now the basil... this is necessary, people. Do not skimp on the basil! I don't know why, but the dip is not the same without fresh basil. If you don't have any, then go get some. Don't use the dry stuff, it's no good here. Buy the fresh stuff, open the package, and take a nice, long whiff. Thank me silently, then chiffonade the basil leaves.

When you're done, it should look a little something like this:


Set the basil aside for later. Then preheat your oven to 350 degrees.

Now, we're going to mix up the heart of this dish. Add your feta cheese (6 oz) and cream cheese (2-3 oz) to a mixing bowl.

WARNING: Don't try this in a blender. Use a hand or countertop mixer. I have already made this error for you, and wasted valuable eating time with the cleanup. Learn from my mistakes. 

Blend the cream cheese and feta cheese together. It's ok if the mix is not perfectly smooth. Little nuggets of feta are a nice surprise. If you like things creamier, go with the 3 ounces of cream cheese. I used two, but I think a little more would have been nice.

Photo by: Abagail Austin 

Next, pour your marinara (about 18 oz) into an oven safe dish. You can use what you like, but a longer, shallower dish would not be so good. Think of something about the size of a cereal bowl. I used this Canopy square dish:


Time for the feta... I used an ice cream scoop in the hopes of having a perfectly shaped ball of the feta mix on top of my marinara. However, it looks a lot like vanilla ice cream!


Don't judge me. Please.

If you don't have a scoop, or you don't want your feta cream to look like actual ice cream, you can always shape the mixture a bit by hand before placing it in the center if the marinara.

Place the dish into your 350 degree oven for 15 minutes. Keep an eye on the dip for the last 5 minutes or so... it should melt and be creamy, but if any browning occurs, it's time to take it out of the oven.

To serve, top with fresh basil. Provide bread (your choice) for dipping.


NOM. Enough said.

Happy cooking, my friends!


The Standard Form:


Baked Feta Cream Marinara

Ingredients:

18-24 ounces marinara sauce
6 ounces crumbled feta cheese
2-3 ounces cream cheese
Fresh basil, about 12 leaves, chiffonaded
Thinly sliced baguette, lightly toasted, for serving

Directions:

Preheat oven to 350 degrees. Using a hand mixer, combine the feta cheese and the cream cheese until mostly smooth.

Pour the marinara into an oven safe bowl, cereal size. Scoop the feta mixture into a ball on top of the marinara.

Bake 10-15 minutes, until slightly melted and creamy. Top with basil, serve with baguette. 


August 8, 2012

Comfort Foods: Rarebit not Rabbit

Comfort food....  the words make me think of cold nights and hot dinners, snuggling on the couch and watching the fire crackle. It's the warm feeling in the pit of your stomach that reminds you of home and family, of good times that are never forgotten.

Everyone's idea of comfort food is different. Perhaps it's your grandmother's famous soup, your mom's lasagna, or your dad's Saturday morning pancakes. What is your comfort food...  Is it mac-n-cheese? Chicken noodle soup? Ahem... anything chocolate??

As much as I love absolutely anything chocolate, my comfort food is something else. When I'm sick, grumpy, missing home or missing my husband, my go-to meal is... grilled cheese.

That's right. Grilled cheese. 

Who doesn't love buttery bread and ooey, gooey cheese? (If the answer is you, I'm not sure we can be friends anymore). While I still whip up a quick grilled cheese on occasion, I've discovered a more grown-up version that really hits the spot. 


Welsh Rarebit. Not rabbit. RAREbit.   

It's shocking, really, how many people think I boil bunnies for dinner when I mention this dish. I promise, I'm not cooking up cute, fluffy bunnies!

What I am cooking is ooey, gooey, cheesy heaven on a plate.

I don't know how the name for this dish came about, so I wouldn't ask me if I were you. I just go with the flow. I do know Rarebit is a traditional British dish. And I know it's scrumptious. 

That is the extent of my knowledge. I think it's enough. 

Would you like some ooey, gooey, cheesy heaven on a plate? Of course you do!! Here's how to get started: 


The ingredients are basic enough, staples which I usually have on hand. Cheese, bread, butter (not pictured, oops!), beer (that's the 'adult' part), whole milk, flour, dijon mustard, chives, and various spices. Oh, and an egg yolk, which also didn't make it into this picture. You're used to me forgetting stuff by now, right? 

Before we get cooking, you'll want to prep a few things. Start by frying several slices of bacon (about 4) in a skillet. Once cooked, crumble the bacon and set it aside. Then, chop one package of chives into 1/4 inch pieces. Set these aside as well. Both will be used for garnish later.   


Also, be on the lookout for bacon thieves! I can't escape them... usually the Hubs is snatching the bacon faster than I can cook it, but this week I had to contend with a new opponent. My buddy, and fellow blogger, Abby!


In spite of her bacon-theft tendencies, I love her much! You might remember Abby from her blog, in which I recently wrote a guest post for: The Conquering of Cardiac Hill

Ok, now let's get down to the nitty gritty! 

The foundation for this recipe is the bread. I go for French or Italian bread. Please don't use regular sandwich bread. Don't do something you'll regret! Regular sandwich bread is just not the same, you've got to trust me here. This cheese sauce needs a nice, sturdy bread to stand up to it. 

So, toast your bread. Been there, done that, I rambled a lot. I won't go into a long explanation here, but if you need it, you can check out this post where I explain it all: "Cooking" for One: Strawberry Balsamic Chicken Salad.

Set the bread aside and get working on your sauce. Quick tip: Have all your ingredients measured and ready to go. The sauce only takes a few minutes. You don't want to be running around, looking for the paprika, and then find out you burned your cheesy goodness, do you?

Melt 2 tablespoons of butter in a saucepan over low heat. Not high. LOW. Once the butter has melted, whisk in 2 tablespoons of flour. This combines to make a little something called a roux. Keep whisking for 2 or 3 minutes, constantly. Don't let your roux burn!

From here, it's all downhill, nice and easy. Drizzle in 1/2 cup of whole milk (you can use heavy cream if you're looking for a richer sauce) and also a 1/2 cup of your favorite beer. For today, I used Blue Moon. No special reason, it just happened to be in my cabinet. Keep whisking as you add the liquids. We don't want any lumps!

Spices are next into the pot.

Here you have some leeway, and room to make substitutions if necessary. Start with 1/2 teaspoon of paprika. Then, add 1/4 teaspoon of Worcestershire sauce. I like to use 1 teaspoon of Dijon mustard, but if you don't have it on hand (or just don't like it!), you can always add dry mustard instead.

A bit of spice is nice, right? I went for cayenne pepper, a few sprinkles or up to 1/4 teaspoon. Again, you can substitute here too. Tabasco works well. Add more if you like it spicy, less if it's not your thing. Or, leave it out altogether. Totally up to you.

Whisk all your spices in, until the sauce is smooth and well-blended.

Photo by: Abby Austin  
Here comes the ooey, gooey... slowly mix in 1 1/2 cups of shredded cheddar cheese. Don't forget to grate it fresh! None of that junk in a bag for us. The secret here is to add only a little bit of cheese at a time, allowing one batch to melt before stirring in the next. You can handle that, right? I thought so. I have total confidence in you.

Let the cheese sauce cook for a few minutes, until melted and hot. Remove your pan from the heat, and add one final ingredient.


An egg yolk! No white, just the yolk. Don't know how to separate an egg yolk? Check out the tutorial here: How to Separate an Egg Yolk. OR, simply crack the egg into your hand (holding it over the sink or a bowl), and let the white slide through your fingers until you're left with nothing but the yolk. OR, buy an egg separator like this one: The Egg Yolky.

I'm rambling again. Oopsie.

So, where were we? Oh yeah... stir your egg yolk into the cheese sauce. Annnnnnnnnnnnnddddd, you're done!

Spoon the cheese sauce over your toasty bread, then top with the crumbled bacon and chives. Heck, add a dollop of sour cream if you want. Or leave it all off, and instead serve the sauce in a bowl with bread pieces for dipping. Be creative, try it your way!

Welsh Rarebit
I won't embarrass her by posting the picture evidence, but Abby and I both agree that Welsh Rarebit is something you lick your plate clean for!

What are your favorite comfort foods? Feel free to share in the comments below. Until then, happy cooking!


The Standard Form:


Welsh Rarebit (serves 4)

Ingredients:

1 loaf of crusty bread (ex: French or Italian)
2 tablespoons butter
2 tablespoons flour
½  cup whole milk
½ cup beer
1 teaspoon Dijon mustard
½ teaspoon paprika
A few dashes - ¼ teaspoon cayenne pepper
¼ teaspoon Worcestershire sauce
1 ½ cups fresh grated cheddar cheese
1 egg yolk
Chopped green onion
Cooked and crumbled bacon

Directions:

Slice your bread into thick pieces and toast. Set aside.

Melt 2 tablespoons butter in a saucepan over low heat. Sprinkle in the flour and whisk until combined. Cook over low heat for 2 minutes. Pour in the milk and beer, whisking constantly, and cook for an additional minute. Add the Dijon mustard, paprika, cayenne, and Worcestershire sauce. Whisk to combine.

Slowly add the cheese in a bit at a time, whisking after each addition. Cook a few minutes, whisking constantly, until the cheese mixture is melted hot. Remove from heat.

Stir the egg yolk into the sauce, whisking to combine.

Serve immediately over the toasted bread. Top with the chopped green onion and bacon.